Showing posts with label crafts. Show all posts

Wednesday, January 4, 2012

So much ribbon, so little space.

My ribbons and various notions were overflowing my shoe box storage system. Since one of my resolutions this year is to become more organized I figured I would tackle this little project. Like any good crafter I scoured the various stores and websites for any ideas I could find. I came across rain gutter storage that would work great, if I had more room. I found shoe box styles with holes in the sides for ribbon, but that wasn't going to work, since I'd need more than one to accommodate my stash. Then I discovered this on pinterest.

Genius. I gave it a try. I already had the pants organizer on hand.

It worked for a while until I outgrew it. What I didn't like about this version was that I had to stagger the spools in order to make them fit. This left me with a lot of unused space.

So then I had to get a little creative. What I ended up doing was combining a couple of different things. The pants organizer is still being used, but now the ribbon is mostly on badge clips from Staples. 

It reminds me of the "clip it up", but a ton cheaper and less space is being taken up. So what do you think? I'm pretty proud of this. If I ever have a craft room instead of craft closet I will probably reevaluate my ribbon again. Until then, I think this will last me for years. How do you store your ribbons? Are you a rain gutter on the wall kind of gal? Do you use a paper towel holder or dowel to store your ribbon vertical? Or do you have everything shoved in a box with a lid that won't close? Feel free to leave a comment below, I love hearing from you.

Monday, January 3, 2011

Cute Hair Accessories

As many of you already know, and the rest of you are finding out, I love to save money. I love making things for cheaper than I saw them in the store or online.  

Here is an example:

Flower Hair Accessory

Here's what I made:
 and this:
and this:

I came across this post by Beckie over at Infarrantly Creative and thought to myself, "Hey, I can do that!" But I think I may have done it cheaper than she did...

My grand total for all of it was $1.75 ($1.50 for the ugly top from Salvation Army that I took apart for the pretty sequins and $.25 for the felt to sew the sequins to.) I had these on hand: the headband, pony tail, and barrette. Also, needle and thread and some black beads for the centers. If I really did some math it would be cheaper than that because I only used a couple of small squares from the felt and have tons of sequins left to do more fun things with.

I think they turned out pretty cute and the girls loved them too.

Thursday, December 30, 2010

Inexpensive Groomsmen Gift

For those of you who don't already know, my sister-in-law is engaged and the wedding is set for June 25, 2011. I'm so happy for her, and couldn't be more excited-weddings are "right up my alley".

Every bride has a budget and sometimes it can be hard to stay within said budget. I'm here to help with that problem whenever possible...

What Groomsmen doesn't like a good beer mug with his name on? The one pictured above was only $2.50 to make. OR The bride and groom could have ordered them online for about $10-15 each plus s & h. Let's save some money, shall we?

Here's what you'll need:


Beer Mugs from the Dollar Tree-these are nice and heavy and no one will be the wiser
Glass Etching Cream-the small container will do, it doesn't take much
Paint brush to apply cream
Stickers and Masking tape to make design on mugs
Rubber Gloves
Newspaper to protect work surface


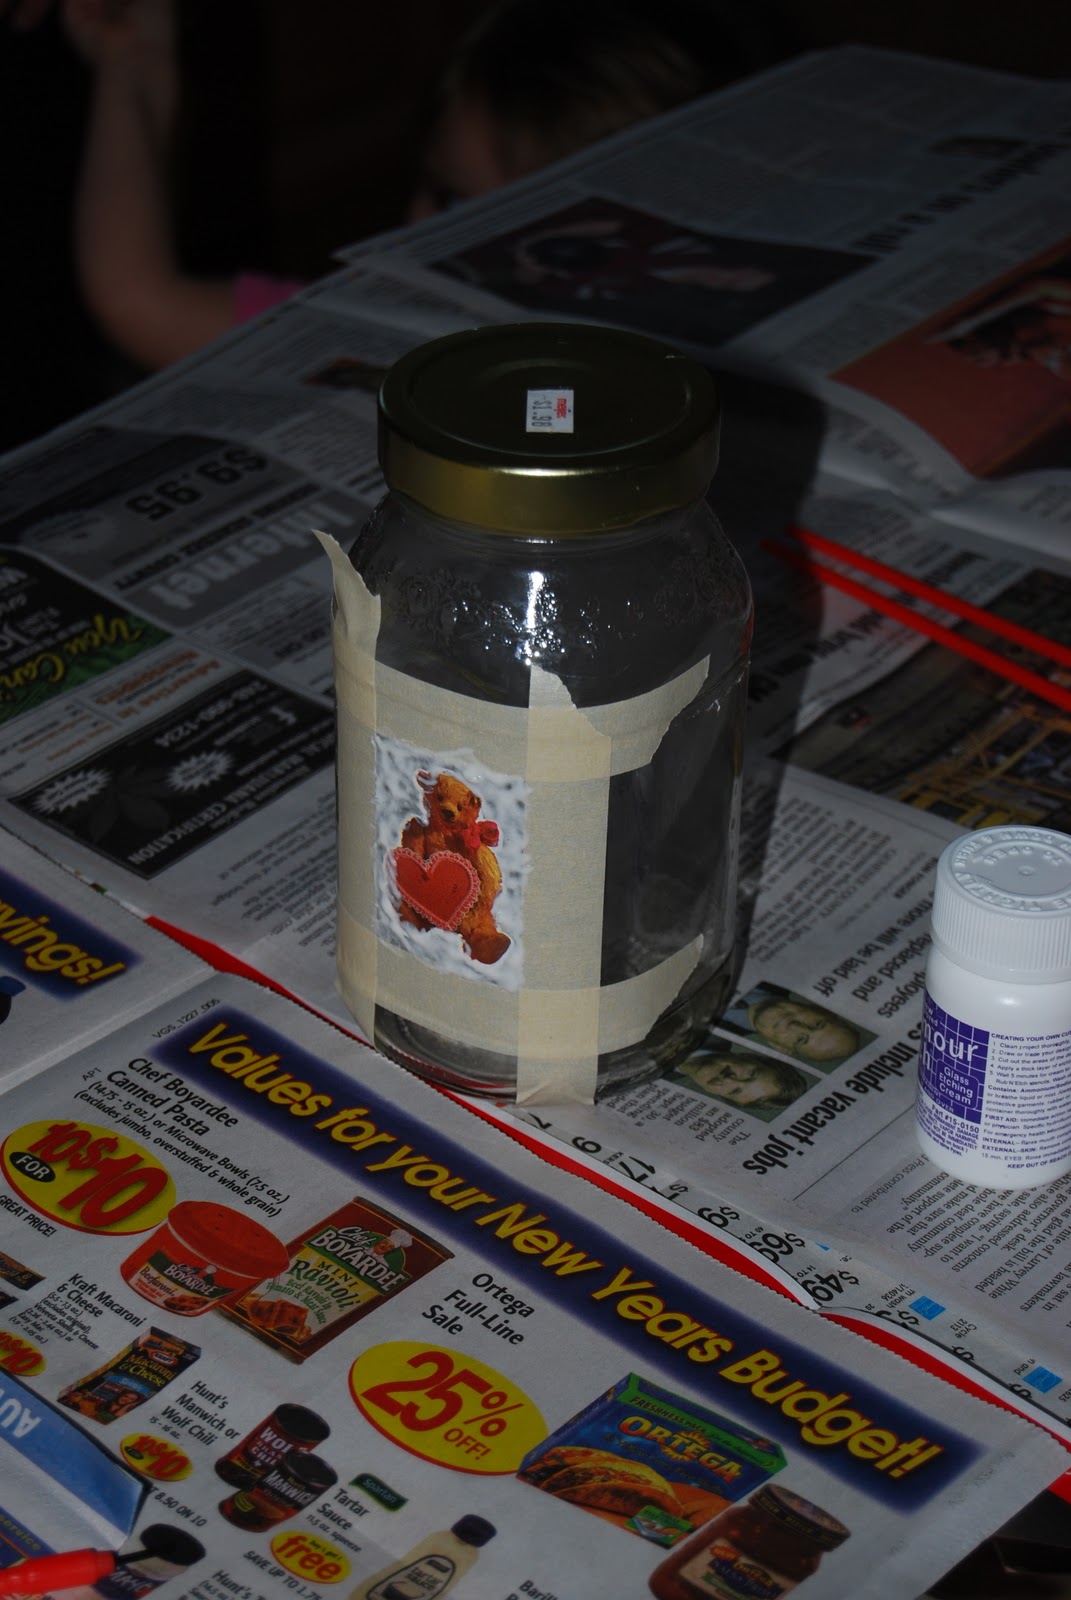
Do a couple of tests on a jar from the recycling bin before moving on to the real thing. We used a spaghetti jar. For the design we used some old stickers and masking tape.


Once you're happy with the results from your test runs, place the stickers on your mug. We used the negative part of the stickers so that the etched part would be the letters. Press the stickers down good and tight so that no cream will seep underneath.


Using the paint brush, dab a bit of etching cream on the glass. Be careful to only put the cream where you want the glass to be etched. We decided that dabbing it on instead of brushing it on gave us the end result we wanted. When it was brushed you could see the strokes.

The etching cream said to wait 5 minutes before rinsing it off with water. We waited 10 minutes because it left a more even etch. This was something we figured out in our test runs, results may vary so make sure you do the tests.

While I was rinsing off the glass in running water it helped to rub it a bit. (Make sure you're wearing the rubber gloves or you could etch your fingers as well.) I also had hot soapy water in the opposite sink basin to help soak off the stickers after the etching cream was rinsed away. 

Here's how they turned out:


I think the guys are going to enjoy them. My sister-in-law and I had so much fun doing this that I think we will be getting together to do vases, frames, cups... everything and anything glass.
Also, she called me this morning and said that the groom is jealous that he didn't have one too.

Wednesday, December 15, 2010

Christmas Photo Cards

What do you do with your holiday photo cards? You can't throw them away-they're too cute (especially if they have my kids on them) ;-)
Anyway, this is a dilemma I faced last year. I had all these photo cards in a basket and they were starting to get worn-OH NO!

So I made this little cutie...

Open her up and this is (kind of) what you'll see.
I normally don't have a normal Christmas card on top but I wanted to keep the privacy of my kids intact. The photo cards we have sent out in the past go first, then I have them in alphabetical order. Yeah, I know it's a little like Monica from Friends.

To make one for yourself you'll have to visit one of my favorite people in the whole wide world. Who is it, you ask? Well, Martha of course! Here's a link to her Holiday Card Scrapbook. I made a few changes on mine to suit my needs. First, I didn't have a grommet setter or grommets. And I didn't want to buy one, so I used a hole punch-it worked fine. Next, I punched 2 holes in mine to make it more like a book. And finally, I added some ribbon to the back cover before covering with the paper completely. In doing this I can tie up a cute bow and keep the dust out while it's not being looked through. I hope you have fun crafting up this little cutie. It will get tons of use.

"Cheap Trick of the Day"

Try a 1/4 c. of distilled white vinegar in place of your liquid fabric softener. I put it in the compartment on the washer. If you don't have that handy little compartment then you can use your downy ball. Don't worry your clothes will not come out smelling like salad dressing. Still not convinced or just a little worried about smell you can put a couple of drops of lavender essential oil on an old washcloth and put it in the dryer. The one and only complaint I have about the vinegar is that sometimes the micro fiber clothes get extremely clingy with static. But I can deal with some static if I'm going to be saving some green.

Here is a little cost comparison from my local warehouse club:
2 gallons of distilled white vinegar $3.38 (this does 128 loads)
Downy fabric softener $9.98 (this does 150 loads)
So I can get about 378 loads of laundry done for the price of 150 Downy loads.


Tuesday, December 14, 2010

Snow Day!!!

School was canceled yesterday. Yay!

But the kids were too sick to go outside and play. Bummer :-(
One is getting molars, one has a cough, and one has a runny nose. And all were cranky and tired. So in trying to cheer them up a bit we did a little craft.

Here's what we did:


These wreaths are all over the internet and they are so simple.

Here are the things you'll need:

Ball Ornaments-Large and Small
(I used the shatterproof ones since the kids were doing the project)
Wire hanger
Coordinating Ribbon (not pictured)

Now take this and...

...do this to it.
(I used my oven mitts to protect my fingers from the hard wire)

Undo the wire wrap at the top of the hanger.
Place some duct tape near the hook so that they don't slide off as you work your way around.
Start threading the ornaments on the hanger filling in gaps as you go with the small ones.

I let the kids pick the order in which the ornaments were put on and I think they did a wonderful job! To let me know what you think, leave a comment or become a follower.

Friday, December 10, 2010

So Simple a Kindergartner Can Do It.


This is my first tutorial so please have patience. Feel free to email me any questions you may have.


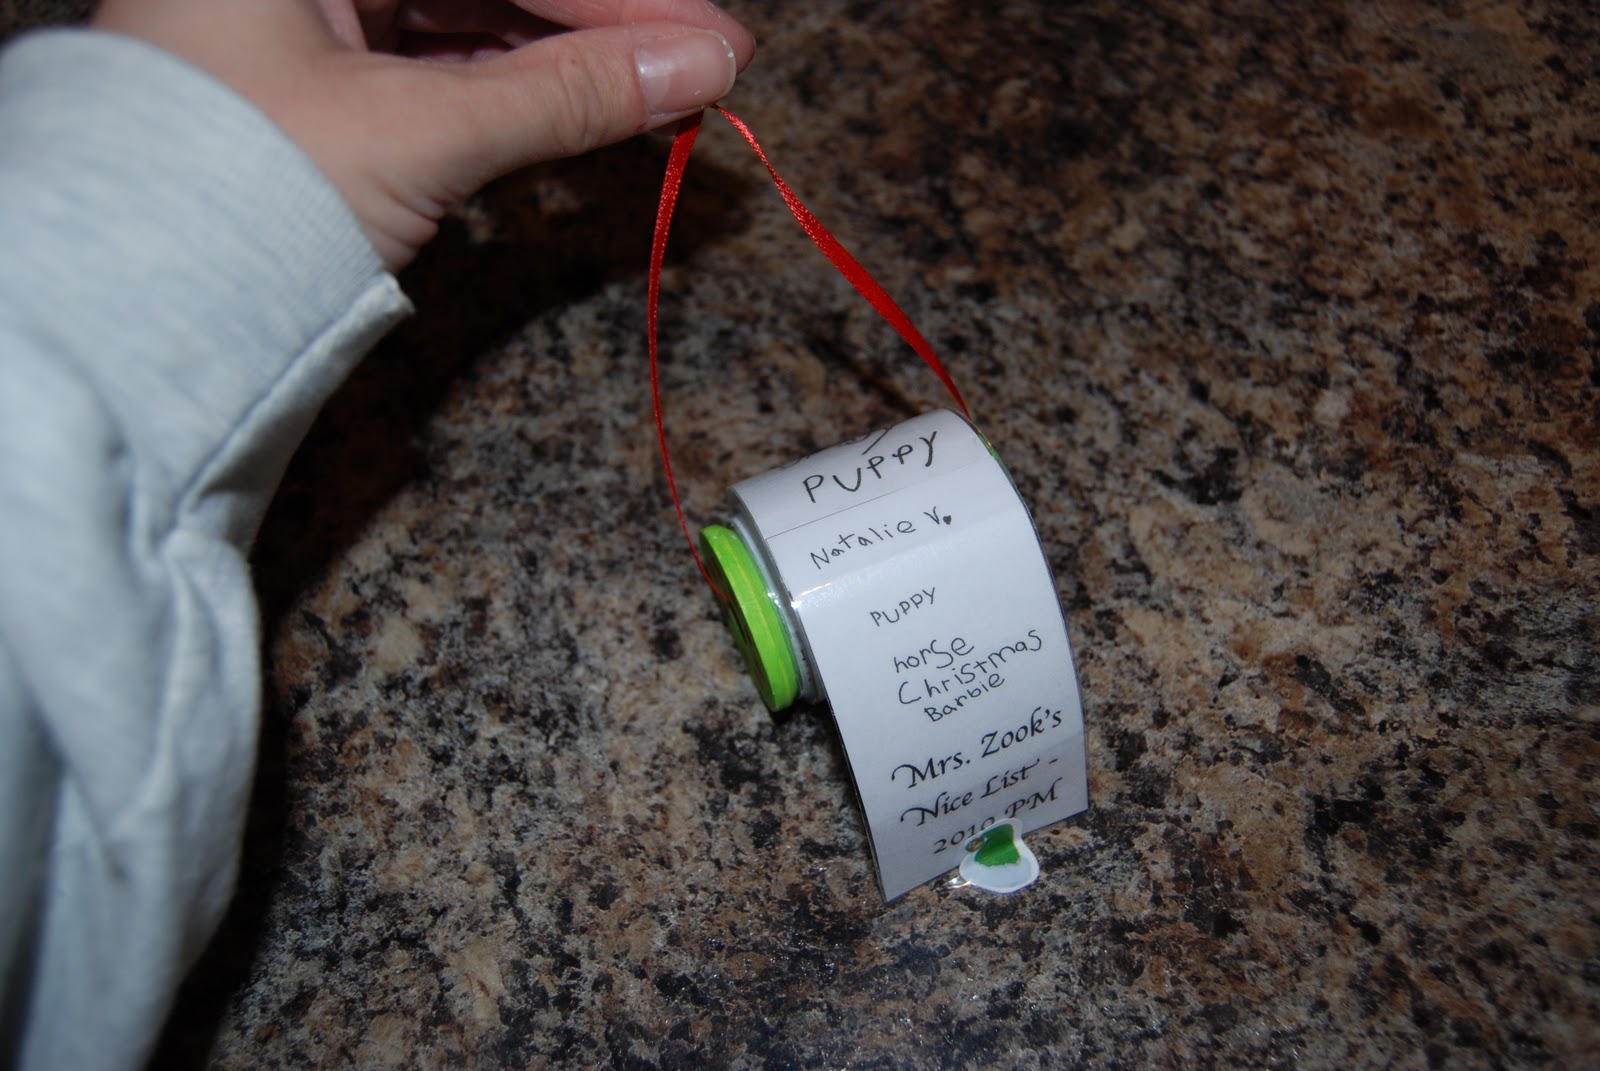
Santa's Wish List


Supplies needed:
Paper
Spool (I used 1 1/2" x 2 1/8"-pack of 6 from Joann's-and they're on sale this week)
Paints in holiday colors
Coordinating ribbon
Glue dots
Pen
And if you do let the Kindergartner participate you'll also need a computer with scanner

Inspiration for this project came from Family Fun Magazine

Step 1:
Prime and paint the spool. 
(I just used white acrylic paint to prime it.)

You don't need to paint any farther than I did-your list will cover that part up.

Step 2:
Have your kids write out their lists... If they still write rather large like shown above then scan into computer and shrink down to 1.6" x 5.25". Put a thin boarder around it so that you can cut it out easier. I enlisted my computer savvy Hubs to do this step for me-Thanks Honey ;-)

This is what it should look like after scanning and cutting it out.

Step 3:
Flip the list over and put 2 glue dots on the top of the paper.

Step 4:
Stick the top of the list down onto the spool as shown.

Step 5:
Using 2 more glue dots... stick them to the spool near the list.

Step 6:
Wrap the list around and secure to the glue dots.

Step 7:
Thread your ribbon through and hang on the tree. Bring back memories of when your child was oh so small for the many years to come. 

Wednesday, December 8, 2010

Leg warmers are too expensive!

Do you have a ballerina in the house? If so, STOP paying too much for leg warmers. $15 is the going rate-some are even more expensive and that is just unacceptable. You can make your own out of a pair of these.

Knee High Socks

These ones were purchased at Target for $4 a pair. Here's the proof:


In the past I have purchased cheaper knee highs at the Dollar Tree. They sell them 2 pairs for a buck, but lately I haven't seen any. :-(

Follow this tutorial by Melissa at Nanny Goat. She has great step-by-step instructions with lots of pictures in case you're like me and get confused. She calls them baby legs because technically they are for babies learning to crawl...but shh, don't tell your little ballerina and she'll be none the wiser.

"Cheap Trick of the Day"

The next time you run out of your blue window cleaner save some money by purchasing a 2 liter of club soda instead. Just refill your old spray bottle with the club soda and use as normal. Your windows will shine, your mirrors will sparkle and your stainless appliances will gleam. I use it on anything and everything shiny in my house and I gotta tell you-I like it better. It takes less elbow grease than the blue stuff and it doesn't leave streaks. And unlike the blue stuff this is a "green alternative". With curious little kids in the house the less chemicals under the sink the better.

Update: Here is what the dollar store leg warmers look like. I used child size knee highs. If you would like them a little bigger use women size instead. And to think I saved at least $14.50 by making them myself.